
You can export Requests that can be shared with other users running Foxfire! on separate machines or environments. A single Export file may contain multiple requests and retain the folder structure. Requests are exported to a file with an FFX extension. After they’re exported, you can send them to other users or use the exported files as backup.
To export a Request:
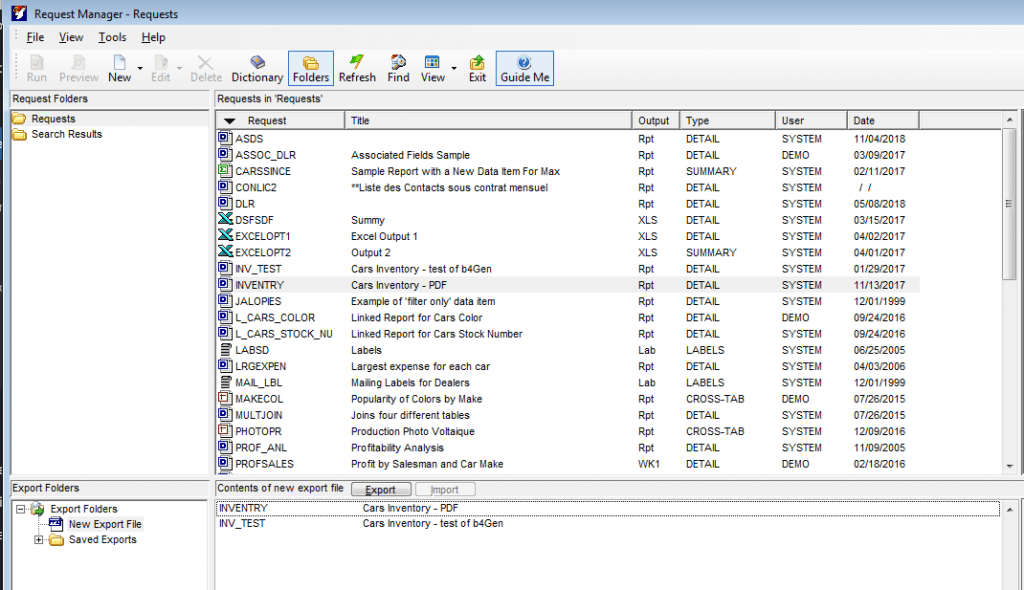
- Select the Request(s) that you want to export.
- Choose Export from the File Menu. (Or choose Export Folders from the View menu.) The folder Export Folders is displayed at the bottom of the screen.
- Drag the Requests you want to export from the Request list to the Export list.(Note: As a shortcut you can right-click on the Request and select Export instead of doing steps a and b. To select multiple Requests, hold the CTRL key while you click on each Request).)
Click Export. The Export Request Definitions dialog box appears.
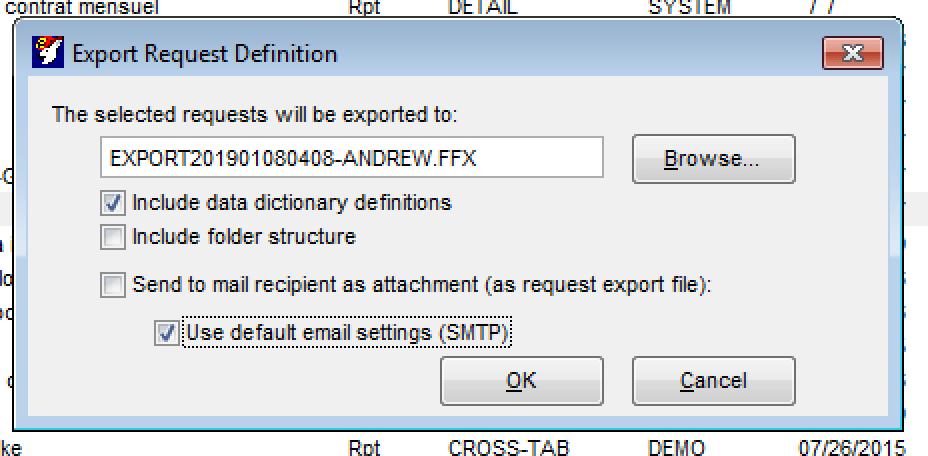
- You can change the name of the export file and the location where it is saved.
- Check the “Include data dictionary definitions” check-box if you want to include the definitions in your export file.
- Check the “Send to mail recipient as attachment” check-box if you want to send the Request by email now. (You will be prompted for the email address after you click OK.)
- Uncheck the “Use default email settings” check-box (it’s checked by default) if you need to specify a different mail sever.
- Click OK. Your exported file will be saved in the Saved Exports folder.